Negative Space Pre Wedding Photos: 5 Tips for Indore Couples
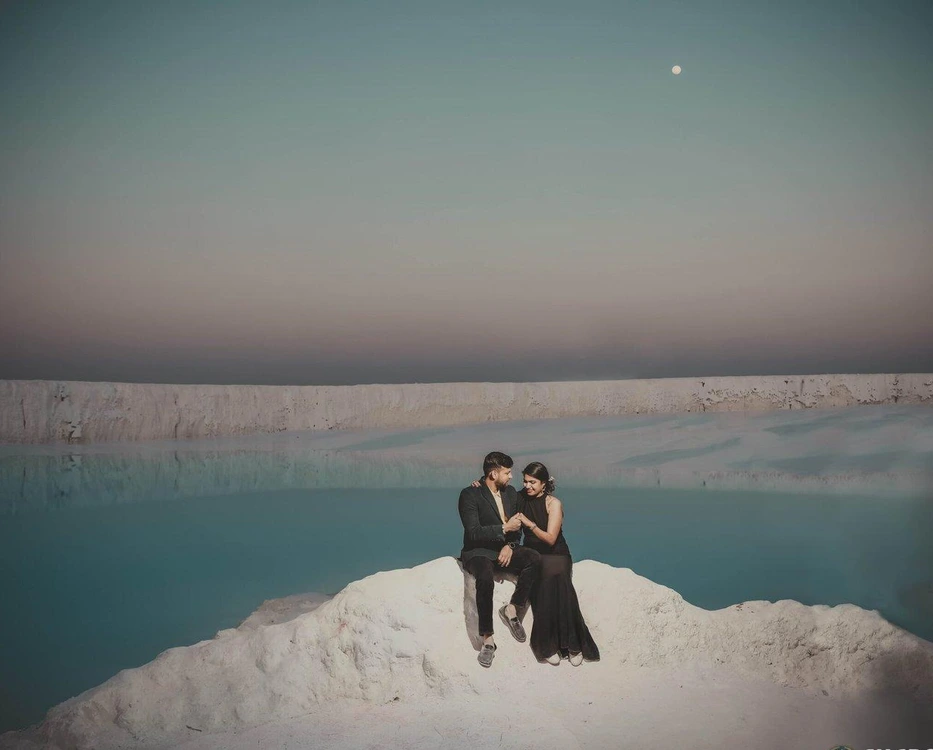
Negative space pre wedding photos leave a deliberate area of the frame quiet around the couple. That space might be a plain wall, soft sky or an uncluttered part of a setting. The people do not have to fill every corner for a photograph to feel personal. For an Indore couple planning a session, this is a composition choice to discuss alongside closer portraits, not a reason to book a particular destination.
The featured image illustrates a small couple within a wider composition. It is not a location recommendation or a suggestion to sit near an edge or water. For your own photographs, use a safe, permitted position on stable ground, and let camera placement create the sense of space.
1. Give negative space pre wedding photos a purpose
Start by deciding what you want the open area to do. It can make the couple feel quiet within a setting, leave room for a carefully planned announcement, or give an album sequence a pause between tighter frames. These are different uses, and they may need different compositions.
A photograph is not automatically stronger because it contains more empty space. If the couple becomes hard to notice, the frame may need a change in position, contrast or crop. Ask for a version with more space and another with less, then compare how the interaction reads rather than choosing the widest picture by default.
2. Keep a clear visual connection between the couple
When the people occupy a smaller part of the picture, a simple gesture can be easier to read than a complicated pose. Turning slightly towards each other, sharing a handhold or standing comfortably side by side gives the frame a clear relationship. You do not need an exaggerated action to fill the setting.
Check whether both faces are intended to be visible. A distant picture can work with profiles or a view from behind, but that should be a deliberate choice, not an accidental loss of one partner. Add closer portraits elsewhere in the sequence so a wide composition is not expected to carry every expression. The close-up pre-wedding photo guide covers that separate part of the story.
3. Look for quiet areas, not merely large locations
A small, plain section of wall can offer useful space in a photograph. A large setting can still be visually busy if signs, furniture, strong lines or bright patches draw attention away from the couple. Ask the photographer to show you the frame, because the area outside the camera view may not matter at all.
Clothing also changes how easily the couple can be found. A dark outfit against a dark area may merge into it; a brighter or lighter edge can help define the outline. You do not need a complete wardrobe change for every composition. Compare the planned outfit with the visible background first. The background planning guide explains those checks in more detail; here, the question is how much quiet area remains around the people.
4. Plan the crop before reserving space for words
If you want to place names or an announcement on a photograph later, tell the photographer before the session. Explain where the finished picture will be used and whether it needs to be vertical, horizontal or square. Space on the left of a landscape frame may disappear entirely in a portrait crop.
Ask for a separate version for the main format rather than assuming one photograph will suit every use. Keep faces, hair and important clothing details away from likely trim lines. Text should sit in an area that stays readable without covering a person. Review the actual final design before printing or sharing it; a promising camera preview is not proof that the type will fit.
5. Balance wide pictures with other album frames
One spacious photograph can change the rhythm of an album spread. Several similar wide frames in a row may repeat the same idea without adding much about the couple. Pair a selected wide picture with a mid-length interaction and a closer expression or detail, giving each photograph a clear job.
This does not require visiting several places. A single suitable area can support different camera positions and framing choices, subject to its permission and safety limits. Use the location and photo-story guide to plan the sequence, then discuss session timing with the photographer. Do not extend a session or move into a risky position simply to make the frame appear more isolated.
What to share before your session
Send a small reference set with a short note for each picture: you might like the quiet space, the size of the couple in the frame or the room left for words. Say which features matter instead of asking to copy the full scene. References should guide composition, not establish that a location is accessible or safe.
To discuss negative space pre wedding photos for your own session, contact WPII on 7385222228. Share the intended album or announcement format along with your references, so the plan can include both spacious compositions and photographs that keep your expressions easy to see.