Full Length Bridal Portraits: A Head-to-Hem Plan for Indore Brides
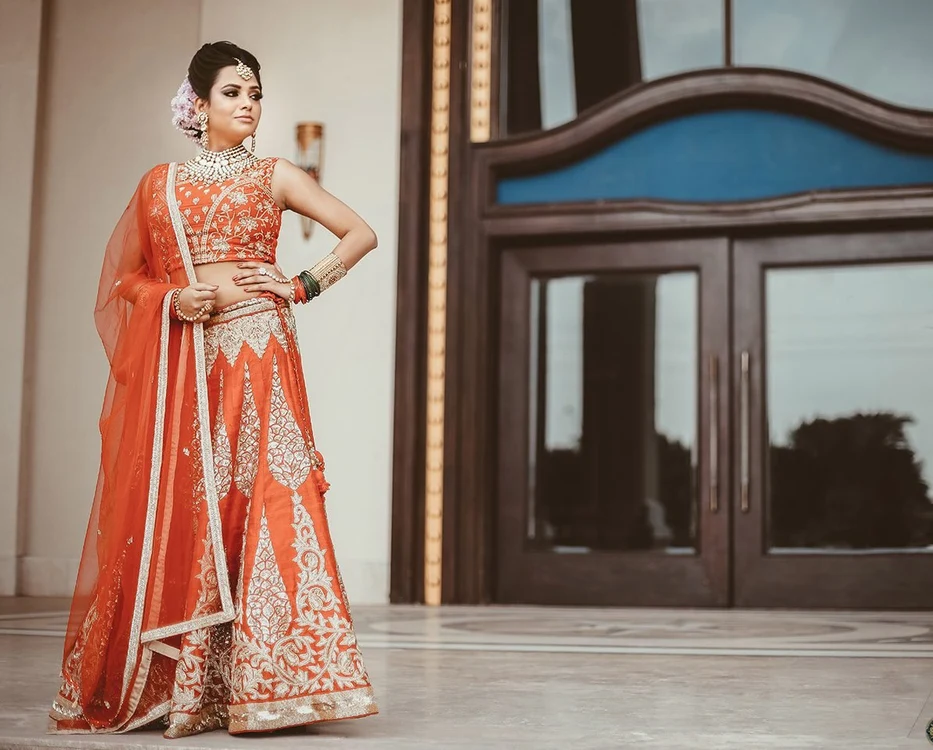
Full length bridal portraits give your wedding outfit room to be seen as a whole. The hairstyle, jewellery, drape and hem belong in the same frame, rather than appearing only as separate details. For an Indore bride planning her portrait time, the useful question is simple: where can you stand comfortably while the photographer has enough room to show the complete look?
This guide is about that head-to-hem picture. It does not require an elaborate pose or a particular venue. A clear patch of floor, considered camera position and a few checks around the edges can make the frame feel deliberate without turning your wedding morning into a fashion assignment.
Start full length bridal portraits with the whole outline
Ask for a straightforward record of the complete outfit before trying tighter or more dramatic versions. Leave visible space above the hairstyle and below the hem. If a train or long dupatta matters to you, explain that it should fit inside at least one photograph rather than disappearing beyond the edge.
Look at the outline as well as the embroidery. A heavy fold can hide a border; a hand can disappear against similar fabric. A small adjustment may be enough. Ask whoever is helping with the outfit before moving pins or lifting a drape, and keep personal comfort ahead of a perfectly arranged fold. The bridal lehenga photography guide goes further into the separate fabric-detail frames.
Choose floor space, not only an attractive wall
A background can look beautiful in a close portrait yet fail a full-length photograph. Check what happens near the floor: bags, loose cables, furniture legs and a bright strip of light can pull attention away from the outfit. Choose a dry, stable standing spot and keep an easy route back to your chair.
The photographer needs working distance too. In his full-length composition demonstration, Neil van Niekerk compares stepping back with simply widening the lens from a close position. Distance changes perspective. You do not need to choose the lens yourself, but you can protect a little space in the room instead of pressing the session into the narrowest corner.
Check proportions before adding a dramatic angle
A camera pointed sharply down or up can change the apparent relationship between the head, torso and legs. That can be an intentional fashion effect, but it need not be your only complete-outfit photograph. Ask for one balanced version first, then decide whether you want an exaggerated angle as an extra.
Shotkit’s full-body photography guide discusses a level camera around the middle of the subject as a useful starting point, not a rule for every body or setting. Let your photographer compare a test frame. Judge whether the picture feels like you, whether the face is clear and whether the outfit keeps its shape. There is no need to chase longer-looking legs at the expense of a natural record.
Build the stance around balance and comfort
Start with both feet secure. If it feels comfortable, shift a little weight to one leg and turn slightly rather than holding a rigid front-facing position. A full skirt may conceal the feet, but the stance still affects the shoulders and how the fabric falls. Avoid deep twists, locked knees or standing on an unstable step for a pose.
Give the hands something simple to do: hold the dupatta lightly, rest one hand near the waist or let an arm relax. Keep the face clear. If a suggested position pulls the jewellery, compresses the outfit or hurts your wrist, say so and change it. Small variations are enough; discomfort is not a requirement for an elegant picture.
Make a short set without rebuilding the outfit
Once the complete view works, change one thing at a time. Look towards the light, then towards the camera. Try a relaxed expression and a smile if that feels natural. Ask for a vertical picture that gives the outfit prominence and a wider version that includes some surroundings, if the space supports both.
Then move closer for the jewellery and face rather than expecting one image to explain every detail. Keep the wide frame as the anchor of the set. For the rest of your solo-photo plan, use the bridal portrait checklist without trying to repeat every idea in one standing spot.
Review the final crop before the session ends
Check the full photograph, not only a zoomed-in face. Is the hairstyle intact? Is the hem inside the frame? Does a background line run through the head? A little room around the outfit also gives more options when fitting the picture into an album or a phone layout later.
To discuss bridal photography in Indore, call WPII on 7385222228. Share one reference, the outfit shape and the time available for portraits. A useful brief is a complete head-to-hem view, a comfortable stance and a clear face, followed by the closer pictures you want to keep.